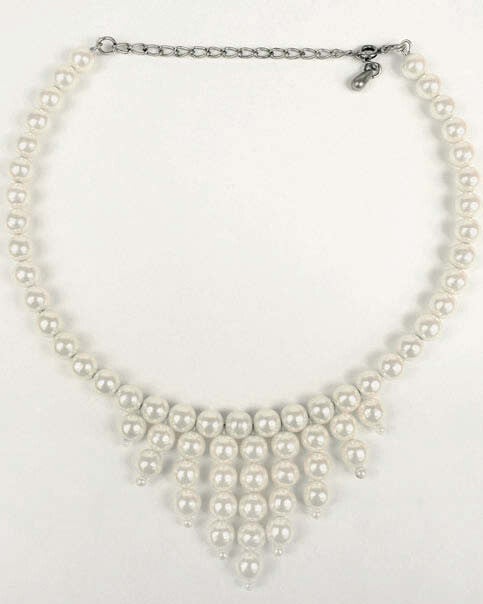
Pearl Pendant Necklace
✨ This necklace is a graceful reminder that beauty is often born from simplicity.
With ordinary stringing techniques and a touch of imagination, you can create an elegant piece of jewelry. Working on this project will help you strengthen your pendant-making skills and gain confidence in assembling finished designs.
You Will Need
🟢 Round pearl beads (7 mm) - For the main accents of the necklace
🟢 Small round pearl beads - For transitions and decorative details
🧵Nylon thread - Strong, flexible, and nearly invisible
🌀 Memory wire - Keeps the necklace’s shape without a clasped base
🔗Clasp - For fastening the necklace
🔘 Two jump rings - To connect the clasp and decorative elements
⛓ Small chain with pendant - The focal element of the necklace
🧴 PVA glue - For securing knots
🪡Thin beading needle - For easy stringing through small bead holes
🔘 Round-nose pliers - For opening and closing jump rings neatly
🌸 Tip for Beginners
Lay out all materials on your work surface before starting. Seeing the elements together helps you visualize the finished necklace and prevents mistakes during assembly.
Necklace Base

🔧 Step 1. Form the first loop
Using round-nose pliers, carefully bend the end of the memory wire into a neat loop.
(This loop will hold the beads securely and prevent them from slipping off.)
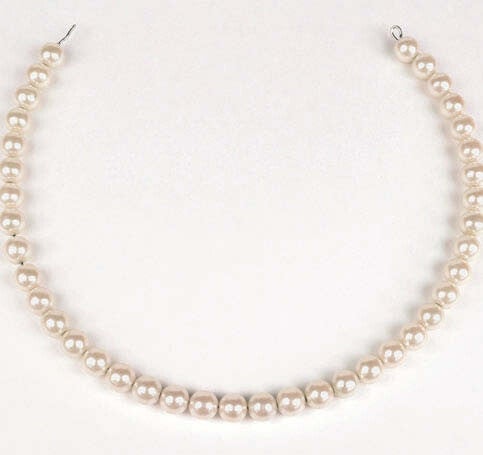
🧵 Step 2. String the beads
Begin threading the beads onto the wire.
Be sure to leave enough free space at the opposite end to form a second loop later.
⚠️ Make sure the total number of beads is odd—this will ensure a balanced design

🔍 Step 3. Adjust the length
From the second end of the wire, remove two beads and set them aside.
(This small adjustment will help the necklace sit evenly once finished..)
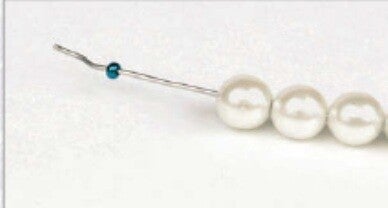
🛑 Step 4. Temporary securement
To keep the beads from sliding while you work, create a temporary stop:
slide a bead or a small crimp tightly onto the wire and press it firmly in place.
This will hold the beads securely until the final assembly.
Pendant
Now comes the most enjoyable part — giving the necklace its character. Take your time, work calmly, and enjoy how the beads come together one by one.

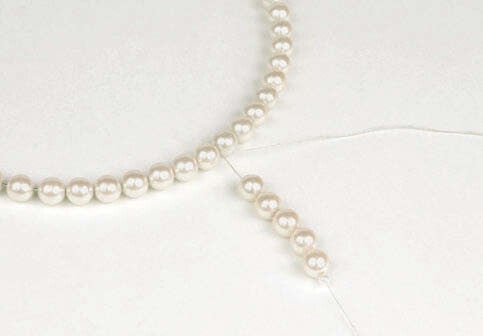
📍 Step 1. Find the center
Determine the exact center of the necklace base, taking into account the two beads previously removed.
From right to left, pass the thread through the bead located immediately to the right of the center.
Do not cut the thread from the spool.
✨ Step 2a. Form the central drop
Thread five large beads and one small bead onto the thread.

✨ Step 2b. Form the central drop
Then pass the thread back through the five large beads, forming a neat pendant loop with the small bead at the bottom.
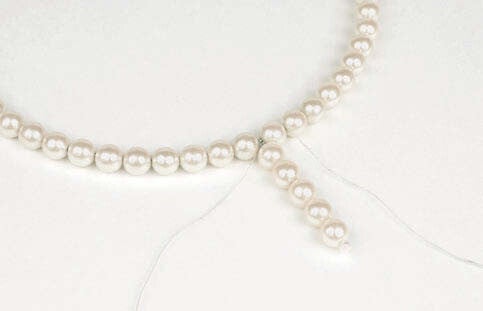
➡️ Step 3. Anchor the pendant
Pass the thread through the next bead on the base to the right, fixing the pendant in place.

🌸 Step 4. Build the cascade
Create a sequence of pendant drops:
-
first: four large beads + one small bead, then pass through the next base bead;
-
next: three large beads + one small bead;
-
then two, and finally one large bead,
each time securing the bottom with a small bead.

🧵 Step 5. Finish the side
Pull the thread through the remaining beads along the base and add a stop bead to secure the work.
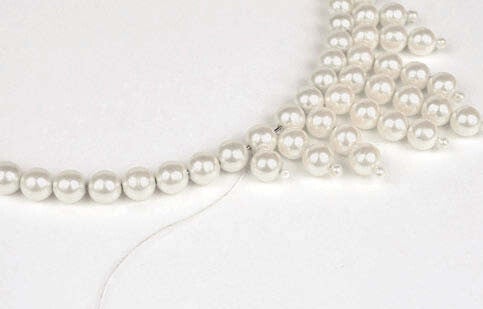
🔁 Step 6. Mirror the design
Cut the thread from the spool, leaving about 50 cm of free length.
Repeat Steps 4 & 5 on the left side of the center, creating a symmetrical pendant arrangement.

Club Tip 💡
For an elegant look, keep the tension even in each pendant drop — the beads should hang freely but not sag.
Clasp
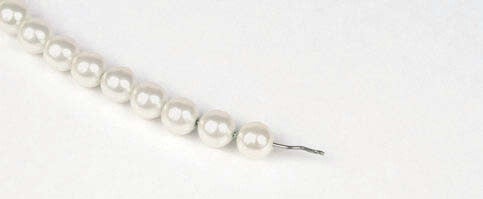
🔹 Step 1. Prepare the base
String the two beads set aside earlier onto the free end of the memory wire.
🔧 Step 2. Form the loop
Using round-nose pliers, carefully bend the end of the memory wire into a neat, closed loop.
Make sure the loop is tight so the beads cannot slip off.
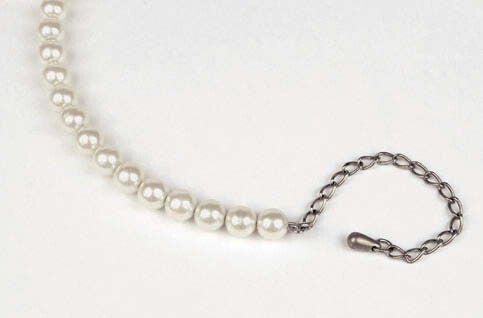
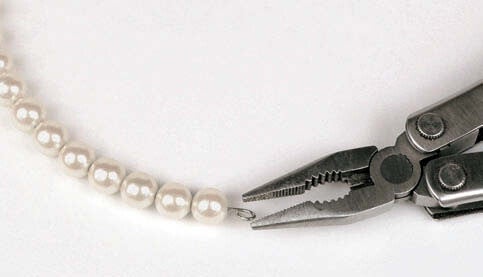
🔗 Step 3. Attach the decorative chain
Open a jump ring and attach the chain with the pendant to one side of the necklace.
Close the jump ring securely.
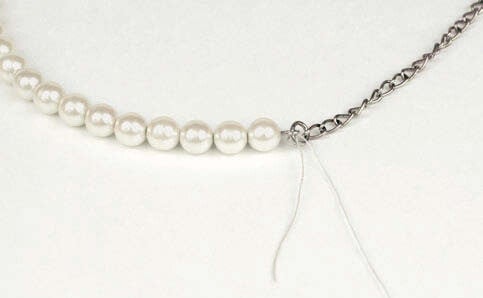
🧵 Step 4. Secure the working thread
Tie the remaining thread from the pendant work to the same jump ring.
Trim off any excess thread and apply a small drop of PVA glue to the knot for added strength.

🪝 Step 5. Attach the clasp
On the opposite end of the necklace, attach the clasp or hook using another jump ring.
Tie the second end of the thread to this ring, trim the excess, and secure the knot with PVA glue.
Helpful Tip 💡
If the working thread runs out during stringing, simply extend it:
-
Tie the new thread to the old one with a double knot.
-
Trim the short ends.
-
Apply a small amount of PVA glue, gently rubbing it into the knot with your fingers.
-
Continue working after the glue has fully dried.
Add comment
Comments