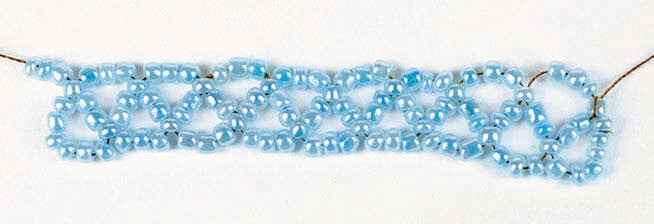
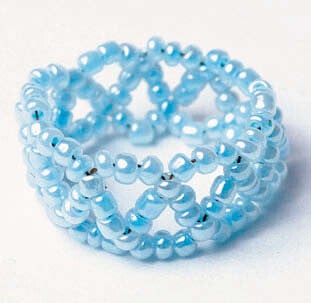
Weaving the Main Pattern
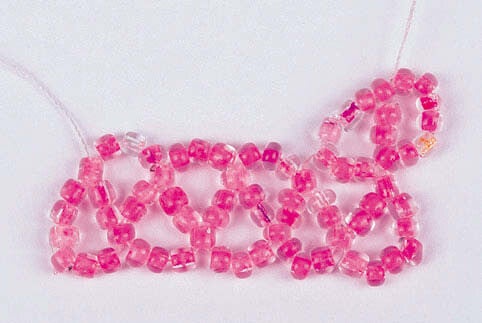
This airy, lace-like pattern is built step by step, and once you understand the rhythm, your hands will seem to weave it almost on their own.
✨ Craft Tip:
To make the weaving clearer and add a decorative touch, try using beads of a different color for the corner beads. They will act as visual guides while you work and give the finished piece a lively, expressive character

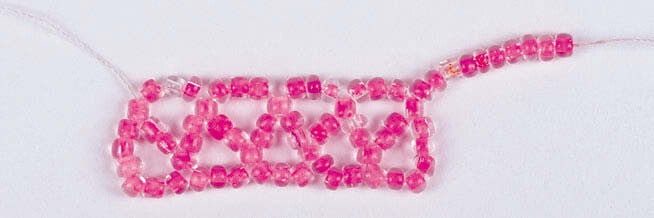
Step 1: Begin the First Figure-Eight
String 10 beads onto your thread (you can adjust the number depending on your desired width). Once all beads are on, loop the thread back through the first bead to close the circle. You now have the foundation of your first figure-eight element.
🔍 Visual cue: You should have a closed ring of beads with the thread exiting the starting bead.
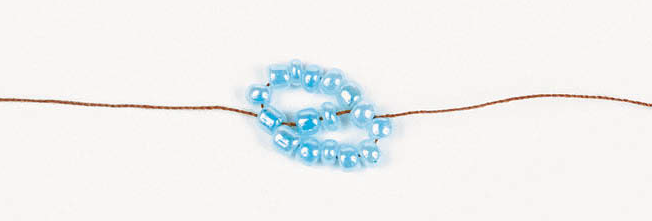
Step 2: Shape the Triangle
Gently spread the loop with your fingers to form a small triangle. For the next element, you’ll only need 6 beads. String these beads and pass the thread through the corner bead of the previous element. This will connect the new element and let your pattern start to grow.
🔍 Visual cue: The triangle shape helps you clearly see the corner bead used for joining.
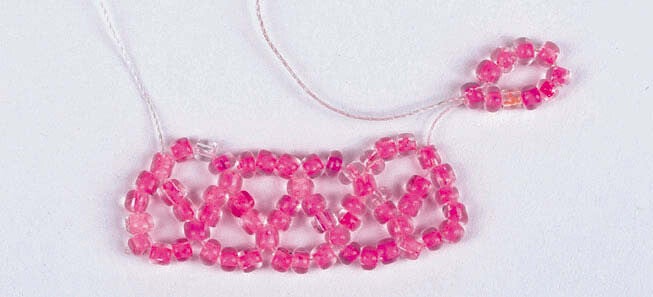
Joining the Ends of the Figure Eight
🧵 Tip:
Connecting the ends of a figure-eight weave is often used when making beaded rings. Keep in mind that the finished ring should be slightly larger than the circumference of your finger so that it can be put on comfortably.
Step 1. To join the chain into a ring, string 3 new beads onto the thread.
Step 2. Use the corner bead of the first element of the chain as the corner bead for the new element.
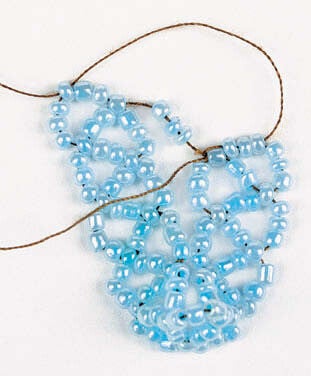
Step 3. String 2 more beads onto the thread and complete the element by passing the needle through the corner bead of the previous half-diamond.
Step 4. Pass the thread through several neighboring elements to reinforce the join, then secure and hide the thread between the beads.
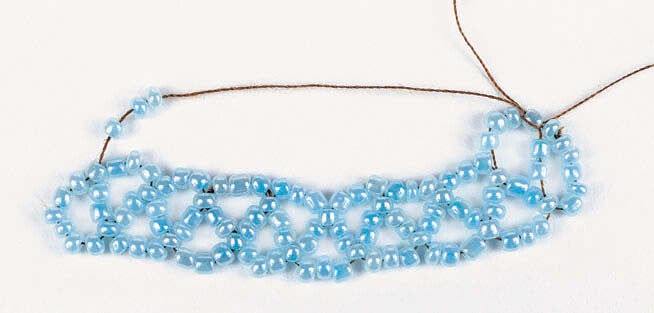
Transition of the Figure Eight to the Second Row
Step 1 ●→
Thread the needle through three side beads of the first row.
String 10 new beads onto the thread.
Step 2 ◎
Guide the needle back through the first of the newly strung beads, moving in the opposite direction.
This closes the new figure-eight element.
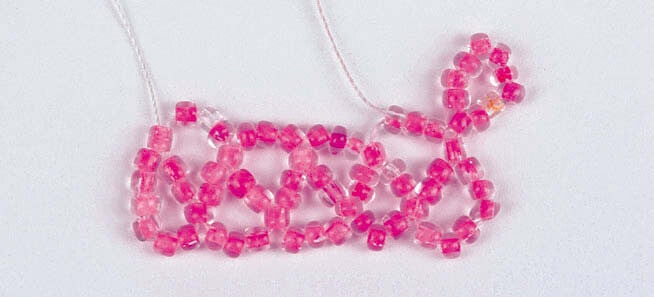
Step 3 →●●●
Pass the thread through the next group of three side beads in the previous row.
Keep the tension even so the rows lie neatly.
Step 4 ●◆
String 3 new beads, then pass the needle through one corner bead of the previous element.
This bead becomes the anchor point between rows.
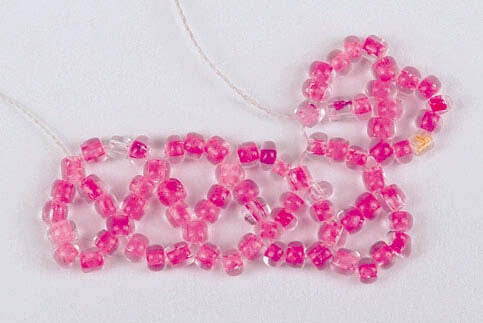
Step 5 ●●●●●● ◎
String 6 more beads and complete the element in the same way as before, forming the next figure eight.
The second row begins to rise gently above the first, creating a light, lace-like structure.
Add comment
Comments