(By Maria Zvereva - Beaded figurines. Zodiac signs with diagrams and detailed explanations. Moscow: Publishing House "E", 2018.)
♈ Aries
✨ Strong and determined, they act with courage and passion.
🔥 Impulsive and stubborn, they fight for justice without fear.
💛 Though brave at heart, they remain sincere and trusting.
🧭 Independent in thought, they always follow their own path.
~~~~~~~~~~~~~~~~~~~~~~~~~~~~~~~~~~~~~~~~~~~~~~~~~~~
🧺 Materials
🟡 Beads
📿 Czech Beads No. 10
• White pearl
• Transparent with inner white coating
• Gold
• Pink pearl
• Gray pearl
• Burgundy transparent
• Transparent red with internal silvering (for the base)
✨ Toho Treasures Beads No. 11
• Golden shimmering olive
⚫ Colibri Beads (3 mm)
• Black (for eyes)

🧵 Threads & Bases
🧶 Mettler hand-quilting thread, ecru
🪡 White silk thread
🎣 Fishing line (for bead weaving)
🪶 Hollow fiber (stuffing)
📄 Dense cardboard (for the base)
Head

1️⃣ Start the Base
Weave the head on thread using the mosaic technique in the round. String two burgundy transparent beads and one golden shimmering olive bead, and close them into a ring to form Row 1.
2️⃣ Begin Increases and Add Color
From Row 2, begin making increases and introduce the pearl white and pink beads according to the pattern.

3️⃣ Add the Eyes
In Row 12, insert black beads following the diagram to form the eyes.
4️⃣ Begin Decreases and Fill
From Row 17, begin making decreases. Gradually fill the head with hollow fiber as you continue weaving.
5️⃣ Finish the Head
In the final row, consisting of four beads, tighten the thread securely and cut it.
Neck
1️⃣ Prepare the Thread
Cut a piece of thread at least 1 meter long. Insert both ends into needles.
2️⃣ Start the Base Ring
String eleven white pearl beads and close them into a ring.
3️⃣ Begin Weaving
Using the mosaic technique, start weaving from the middle, working in both directions.
4️⃣ Form Upper and Lower Parts
With one end of the thread, weave the upper part of the neck.
With the other end, weave the lower part of the neck.
5️⃣ Shape the Neck
Following the pattern, make synchronous decreases on both sides, forming corners at the top and bottom.

Body

1️⃣ Weave the Main Body Section
Using the mosaic technique, weave 17 rows with 16 beads each, following the pattern (as in Row 9).
After completing these rows, the total number of rows should be 28.
2️⃣ Start the Body Base
Weave the body with white pearl beads using the mosaic technique.
Begin from the back part.
String four beads and close them into a ring to form Row 1.

3️⃣ Make Increases
From Row 3 to Row 8, make increases according to the pattern to shape the body.
4️⃣ Weave Straight Rows
Next, weave 18 rows, each with 16 beads, without changes.
5️⃣ Begin Decreases
From Row 29, begin making decreases at the corner following the diagram.
6️⃣ Fill the Body
Gradually fill the body with hollow fiber as you continue weaving.

7️⃣ Attach the Head
Sew the head to the upper (narrower) part of the neck, securing it firmly.
8️⃣ Fill and Attach the Neck
Fill the neck with hollow fiber.
Sew the lower part of the neck to the beveled corner of the body.
Legs
1️⃣ General Instructions
All four legs are woven on thread using the same method, with slight differences between the right and left legs according to the pattern.
2️⃣ Weave the Hooves
Using golden beads, string five beads and close them into a ring to form Row 1.
Weave four additional rows, each with five beads.
3️⃣ Weave the Lower Leg
Switch to white pearl beads and weave 10 rows, each with five beads.
4️⃣ Make the First Increase
In Row 16, make one increase.
Then weave seven rows, each with six white beads.
5️⃣ Begin Decreases
From Row 24, begin making decreases at the corners according to the diagram to shape the legs.
6️⃣ Complete the Legs
Follow the pattern to form two right legs and two left legs.
7️⃣ Fill the Legs
Lightly fill each leg with hollow fiber as you work.
8️⃣ Attach the Legs
Sew the finished legs to the body using fishing line, securing them firmly.


Horns & ears
1️⃣ Prepare for Weaving
Weave the horns and ears on fishing line, following the diagram “Aries Head 2.” In the diagram, two single beads are marked in green symmetrically, along with one connected pair.
2️⃣ Attach the Horn Base
Attach the horns to the connected pair of beads according to the “Aries Horns” scheme, using monastic weaving in the round.
3️⃣ Weave the Horns
Continue weaving until 8 rows are completed.
4️⃣ Form the Curve (Strut and Twist)
After completing 8 rows, create the strut and twist. Wrap a separate thread through a group of parallel beads and gently tighten it to form a curved shape.
5️⃣ Weave the Ears
Using white pearl beads, weave the ears onto the marked single beads following the diagram and using the Ndebele technique.
6️⃣ Mirror the Horns
Weave the second horn in a mirror reflection of the first to ensure symmetry.
Fur Decoration (Neck and Body)
1️⃣ Prepare the Surface
Completely cover the neck and body parts with fur according to the pattern.
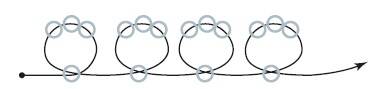
2️⃣ Attach Bead Loops
To each bead of the covered areas, attach a loop of three transparent beads with an inner white coating.
3️⃣ Choose the Thread
Use a thin silk thread for this step to ensure the fur lies smoothly and does not stand upright.

Stand (Base)
1️⃣ Weave the Base Pieces
Using monastic weaving on fishing line, weave two squares, each consisting of 16 × 16 crosses.
2️⃣ Insert the Support
Cut a square of dense cardboard measuring 4.7 × 4.7 cm.
Place it between the two woven pieces.
3️⃣ Braid the Perimeter
Join the two squares by braiding them together around the perimeter, enclosing the cardboard inside.
4️⃣ Select Bead Color
For fire signs — Aries, Leo, and Sagittarius — use transparent red beads with internal silvering for the stand.
5️⃣ Attach the Figure
Sew the finished Aries figure securely to the stand.
Add comment
Comments